

AlphaScan S1 Unboxing and First Connection Guide
Official walkthrough for unboxing your AlphaScan S1 3D scanner and completing initial hardware setup to prepare for scanning.
This guide covers unboxing and initial physical connection for your AlphaScan S1 3D scanner. Always refer to your official product manual for complete setup, calibration, operation, and safety instructions.
What's Included In The Rugged Protective Hard Case
Your AlphaScan S1 3D scanner sits in a custom fitted compartment inside the rugged protective hard case. Also included are marker targets in 3 mm, 6 mm, and 12 mm sizes.
Additional included contents are the expansion dock, connection accessories and cables, Certificate of Conformity, Warranty Card, and Calibration Board.
Cable Connection Steps
Begin setup by plugging the data cable into an available USB 3.0 port on your computer.
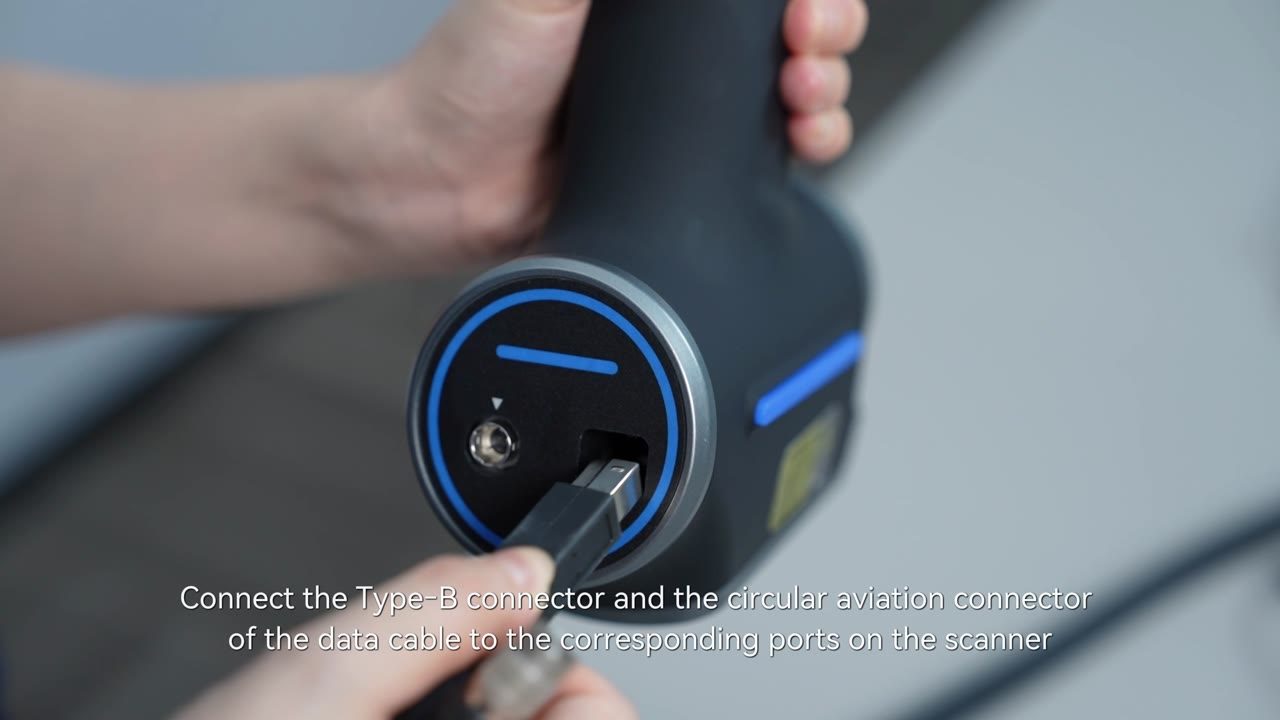
Connect both the Type-B connector and circular aviation connector on the opposite end of the cable to their corresponding ports on the AlphaScan S1 scanner.
First Startup and Pre-Scan Check
Power on the AlphaScan S1. The scanner's blue indicator lights will activate as it completes initialization.
Once startup completes, your scanner is ready to begin 3D scanning.
Unbox and Prepare Your AlphaScan S1 For Scanning
- Review the main items shown in the rugged protective hard case
- Connect the data cable to your computer's USB 3.0 port
- Attach both cable connectors to their corresponding ports on the scanner
- Power on the scanner and confirm it is ready for scanning
This guide only covers unboxing and initial hardware connection. Always follow the official AlphaScan S1 product manual for full installation, calibration, operating, and safety instructions.
Hangzhou Insvision Technology Co., Ltd.
Address: Building 1, No. 1399 Liangmu Road, Yuhang District, Hangzhou, Zhejiang 311121, China
Copyright © Hangzhou Insvision Technology Co., Ltd. All rights reserved.
Copyright © Hangzhou Insvision Technology Co., Ltd. All rights reserved.